3D printed Avatar!
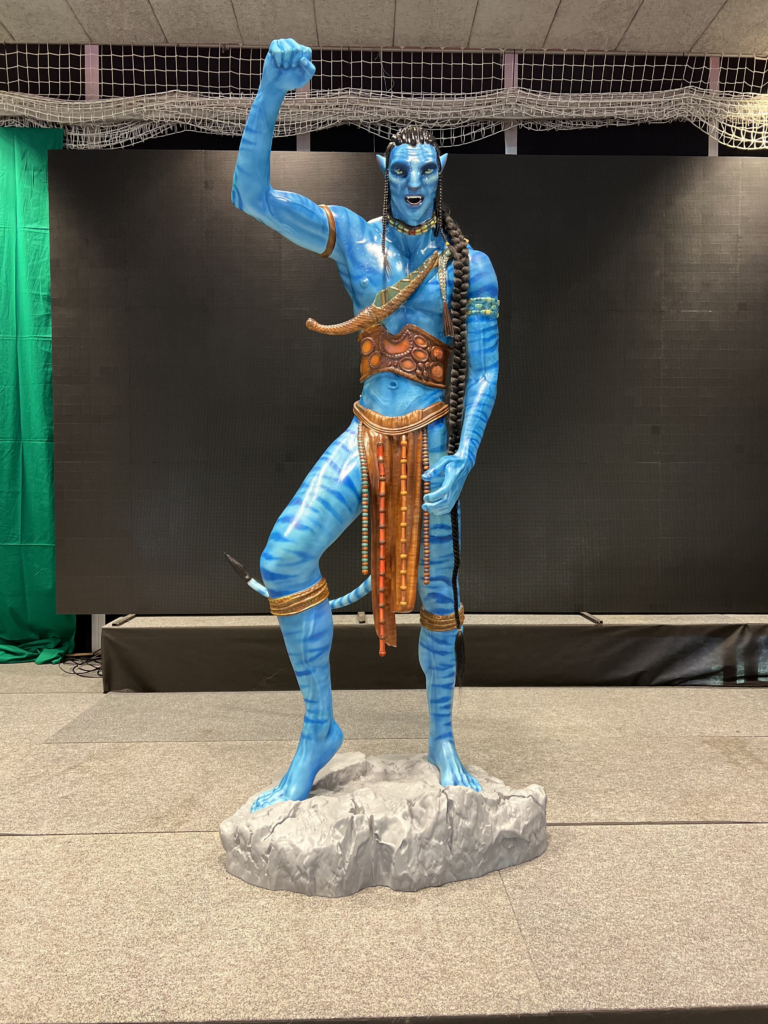
For this year’s “3WAY Open House” we have prepared a special surprise. Attendees were amazed by Avatar, a 3D printed sculpture that is 270 centimetres tall! The surprise was a success, because during the event no one suspected what was hidden under the black carpet. All participants were of course able to have their photo taken with him and thus get a picture with the first “real” Avatar in Slovenia.
WHY AVATAR?
From the very beginning, we wanted to create something special for this year’s 3WAY Open House. On the way back from the fair in Belgrade, the idea of making a sculpture of the Avatar came to me. The Way of Water (“Avatar 2”) will premiere in December at Cineplexx, exactly one month after our event. On the other hand, we wanted to make a sculpture that was really huge, to show that you can do almost anything with a 3D printer.
CAD MODEL OF AVATAR
The Avatar sculpture is very complex, but perfectly feasible to make with a 3D printer. The basis was clearly a CAD model, which we bought. This was followed by some modifications to the model, as we had to optimise some parts and ensure proper disassembly for transport, etc. We envisioned the final product to consist of four main parts – the top, the bottom, the tail and the rock. So, from the very beginning, it was necessary to think about how the statue would look when assembled.
There was some work around the tail attachment, and some structures had to be added to the waist parts to join the upper and lower parts firmly together. All of this, of course, to ensure that the statue would stand firmly when assembled as a whole.
The second joint was at the tail where the screws were used for fixing. For the latter, it was necessary to cut a groove in the tail. For the base, a rock was included in the model, which was narrowed slightly to make it not too wide, and the Avatar’s footprint was made in it. However, it had to be taken into account that the rock would have a large enough surface area for the Avatar to stand stably.
The whole model, which we modified accordingly, had to be cut into parts before 3D printing, as the main four were still too big to 3D print in one go. The upper part was cut into 19 pieces, the lower part into 21 pieces, the rock into 10 pieces and the tail into 5 pieces. Between the surfaces of the cut pieces, it was also necessary to draw grooves for the wooden dowels used in assembling the furniture parts. After that, our Avatar was ready for 3D printing in 55 pieces.
3D PRINTING
Before starting 3D printing on the FFF 3D printers, we decided to test print on a resin 3D printer. We scaled the model to 18 centimetres, of course, and then used a Shining3D AccuFab L4K 3D printer to print the model with precision. This gave us a better idea of what the sculpture will look like in reality.
We used only two 3D printers to 3D print the “real” model, the FlashForge Creator 4 and the Intamsys Funmat Pro 410. The choice of these two 3D printers is purely for a simple reason – they have a large 3D printing volume. Slightly larger parts were printed on
Creator 4
, and slightly smaller ones on
Funmat Pro 410
. For the 3D printing, we used 72 kilograms of PLA material, which was pre-dried in a FlashForge Drying Station to ensure the smoothest 3D printing possible.
Parts of our Avatar:
- Bottom – 21 pieces and 430 hours of printing
- upper part – 19 pieces and 370 hours of printing
- scale – 10 pieces and 480 hours of printing
- 5 – pieces and 80 hours of printing
LATE WORK
We had toremove the supports from the 3D printed pieces in some places, but most importantly we had to label them carefully so we knew which one went where. The 3D printing was clearly done by the 3D printer, it was only necessary to send a G-code with instructions to it and the rest of the work was done manually.
The mating surfaces of the parts had to be prepared for assembly. The dowels were inserted into the holes, the surfaces were coated with epoxy resin and the dowels were joined. Piece by piece, our Avatar grew bigger and bigger. The sculpture was interesting because of its size, even when completely untreated.
Then came the “dirtiest” part of the job – puttying and sanding the joints. The edges of the mating surfaces were, of course, visible and had to be filled with polyester putty. When the latter dried, bulges formed and had to be sanded off. It made the Avatar look quite colourful, but we knew that once the primer was applied, everything would look very different. To put the icing on the cake, we used the hyperMILLsoftware to create a CNC machining program to cut the eye area, as we wanted to ensure the most precise possible substrate for gluing the eyes.
After assembling, gluing, puttying and sanding, our Avatar stood firm and showed its final form. All that was needed was painting and finishing touches. Before painting, we first blew it out and cleaned it with alcohol to remove the dust and ensure that the paint adhered well to the surface.
The primer was applied twice to Avatar, revealing a few details that needed to be corrected with putty. The statue was then sanded once more, followed by the application of white and then blue, or Avatar’s “skin” colour.
In the end, it was all about having a steady hand, as it was the turn ofcreating the lines on the Avatar’s body and drawing the many details. The waist and the face in particular required a lot of work. To give the Avatar an even more authentic look, we’ve added a 150 centimetre-long hair tied in a braid, plus two smaller ones in the shadow area. We attached more beads around his waist , glued eyes to the eye sockets and the Avatar statue was finished.
In total, the post-processing took us around 200-250 hours, which is not that long for such a large and detailed project. We can admit that it was often difficult to devote time to the production of Avatar, but with the goal of presenting it at our “3WAY Open House” and thus creating an unforgettable surprise, the motivation was always high.
AVATAR DISCLOSURE
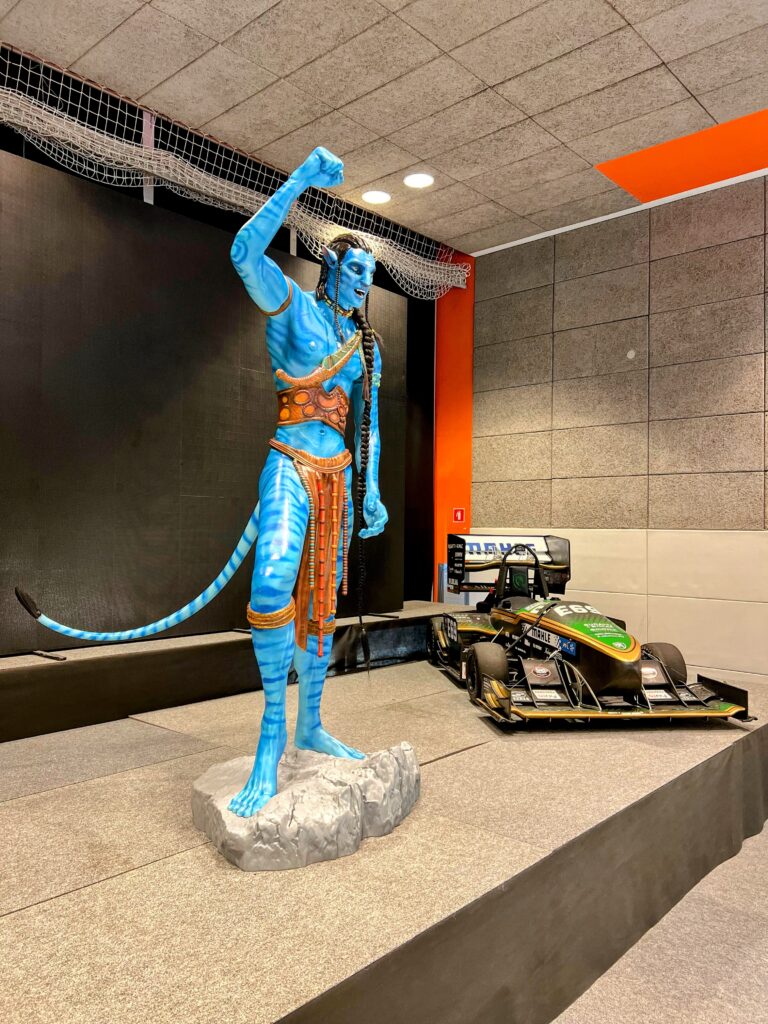
As mentioned in the introduction, we prepared a surprise in the form of a huge “real” Avatar especially for our “3WAY Open House”, where we invited all existing and potential customers. We placed it in the corner of the hall next to the LCD screen and covered it with a black tarpaulin. We are sure that none of the participants knew what was down there, just something huge.
A loud “wow” went around the room when he was unveiled , which means that many people were actually shocked by what they saw. This is exactly the effect we wanted to achieve by creating an avatar. We wanted to show what can be done with 3D printing.
After the event, it was carefully dismantled and brought back to our premises, where it now adorns one of our offices. It is with the greatest pleasure and satisfaction that we congratulate all our customers, who, of course, want to see it in person. And the surprises around Avatar are not over yet from our side, so stay tuned to see what we do with this work of art.


